
At work one of my primary jobs is chainsaw repair and the bench surface I've been working on is just a piece of OSB board similar to particle board. As a work surface this totally sucks. It isn't durable, soaks up oils and gives me slivers under my nails every time I go to pick up a small part. I've been wanting to upgrade and finally took the time when the boss offered up some sheet plastic that was left over from a dump truck bed liner. My vision isn't getting any better and the bright white surface works great for spotting small parts and really helps me see what I'm doing. The following job was one of the first repairs done on the new work top. So far I like it.
A while back I was prepping a new saw for a customer. I poured bar oil in the tank and the work bench started filling up with oil. Further inspection revealed a crack in the oil tank. Not sure if it happened at the factory or at our shop but it needed to be fixed. Unfortunately the oil tank is part of the engine shroud which is the piece everything else is bolted to.

The broke ass saw on the left, the replacement engine shroud on the right. Pretty obvious that everything has to come apart.

A view of the other side with the clutch removed.

Muffler and oil pump removed. Oil feed hose and bar stud swapped directly onto new shroud.
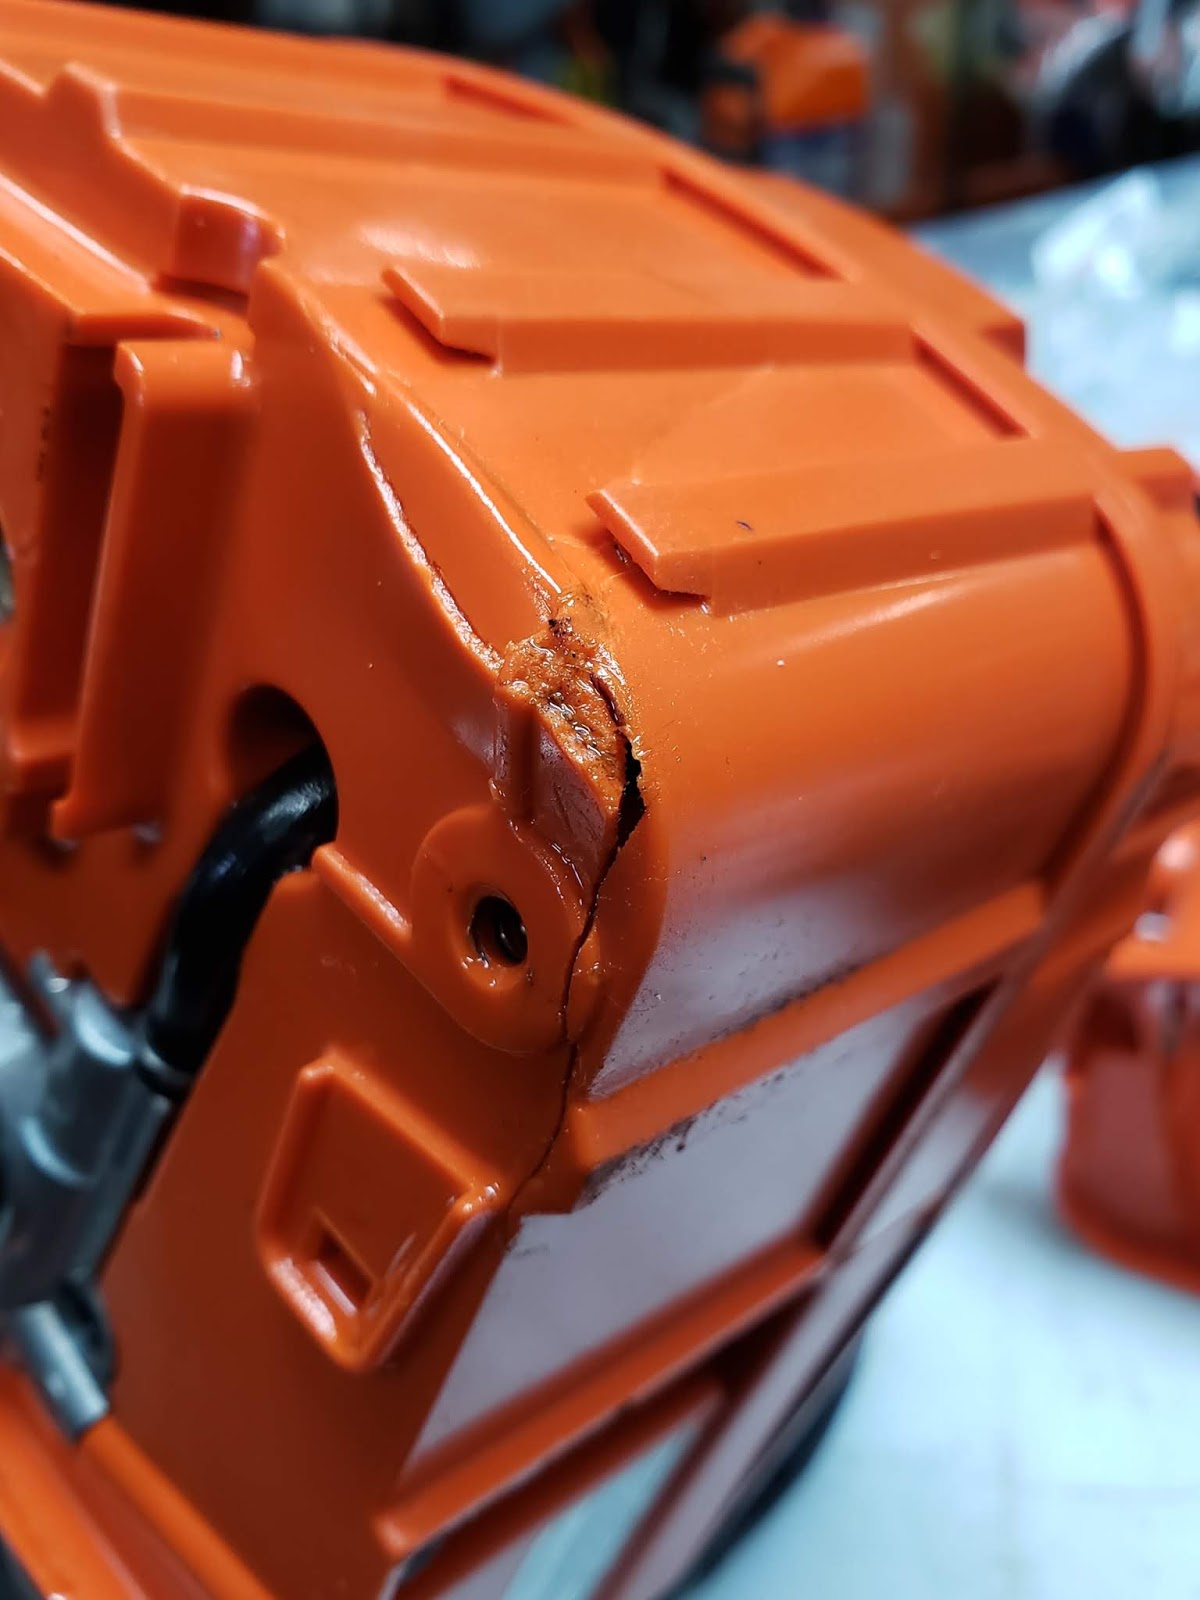
Here is a close look at the damage. Someone dropped this saw before it had a bar on it.

Heres what works for me to remove screw-in bar studs. I screw a larger Stihl style bar nut on first then jam a smaller Husky style nut against it. Now I can easily use a wrench or socket to run the stud out (and back in).

Starter cover and handle isolation springs were next. This white surface is really nice to work on.


The air filter, carb and fuel lines, and ignition wiring are all removed. This job is so much easier being a clean brand new saw.

Intake boot, spark plug and the bolts holding the shroud to the engine are all removed.

The engine can now be removed from the shroud and the whole process gets followed in reverse. Its easy for me to see that no screws are left on the bench although I can't say if any rolled onto the floor. Maybe I should paint the floor white?

Echo allows 1.3 hours labor for this repair. I came in at about 1.5 hours but its hard to be certain. There are no one hour blocks of time when there are no interruptions so I'm just guessing. I know I can get that number down now that I've been in this model once plus if I ever do it again I probably won't be taking pictures. The work top is a big success and I now wish I'd have done it sooner. One thing not seen in these pics is the right side of the work top near my tool box. I left a 2" overhang and drilled a series of holes so I can store commonly used tools. Its really made a difference in the cleanliness of my work area. I know the guys at the shop will laugh at this but I'm making an effort to clean up my work space. We'll see how that goes.
Later.
Nice surface to work on. I’d consider a lip all the way around as I’m always having things roll off and disappear between the table surface and the floor.
ReplyDeleteAgreed but I'm considering routing a groove just inside the edge. That will be easier on my forearms and equipment hanging off the edge. Just not sure if a groove will be enough.
ReplyDelete