Yesterday was a day of continuing education for three of us at work. In order for us to maintain our warranty repair status for Echo handheld products, every year we have to send people to service school. Sometimes these are a refresher course and sometimes I actually learn something new. This course was about carburetors. For me, yesterday was all about stuff I do every day so not much new there. For James who doesn't normally do carb rebuilds, it was a good day to learn some new stuff.
Greg, who happens to be the lead lawn mower tech of the largest Husky dealer in the state, has been through this material as well. Sure there were some model specific details we picked up on and there was the discussion about new models coming out, but for the most part carb work hasn't changed in a long time. Some things that have changed are special coatings, processes and materials used these days to hold up to the effects of ethanol.
All in all it was a well prepared school and attendance was worthwhile.
That's really all I have for you today. It looks like temps may get up to fifty this weekend. Maybe I'll be able to get out for a ride!
...because I can't think of anything interesting to talk about today, and I don't want to talk about having to drive to Milwaukee yesterday to recover my wifes car that had a bad wheel bearing. No progress on the BSA. Nothing interesting happened at work. No social life to speak of. These pics were all in my phone and may or may not have been previously posted on this blog.
I know this was a warm sunset because I'm wearing my mesh jacket.
I'm anxiously looking forward to getting back on the bike.
Kudos to this guy spotted on his bike two days ago.
I really should push the sporty out of the living room and go for a ride.
Kinky links. A generous twist of the right wrist will straighten that right out!
I don't necessarily agree with this statement but I can appreciate the humor.
I like to be honest with my customers about their equipment.
stupid cat
Same stupid cat trying to be cute.
I had to tear this saw down this far just to tell the customer it wasn't worth fixing.
It's been a long winter. I'd take a wet foot if it meant going on a warm ride.
I got to workin on the BSA last weekend and thought I was making some progress.
I found a bunch of parts that all looked like they belonged together and so I cleaned them up and started assembly. It soon became obvious I was missing something. A close inspection of the above pic will make it clear whats missing.
I'll make it easier for you.
I'm missing 20 bearings that should be supporting the clutch basket. I can't find them anywhere but I'll make one more lap around the shop just to be sure. I took this apart some time in the 1990's and I don't remember the disassembly in detail but I can see that it would be easy to pull this apart and have the bearings all hit the ground. What I may have done with them if I even found them all is uncertain.
For now the plan is to take a look at what other parts I may need to finish assembly of the engine before I place an order for old Brit parts.
I suppose I could move on to other parts of the bike assembly. I'll keep you posted.
A few posts back I reported the addition of an Ebling Back Blade to my plow truck. I've really only had a few chances to play with it but I can see it will be a big time saver and a very useful weapon in the battle against accumulated snow.
In true greasyshoprag fashion, I have provided you with a craptacular picture of the truck the way it sits today.
The front blade is a SnowEx power plow that extends from 8'6" to 11 feet. I talked about how I hate handheld controllers and that I was gonna permanently mount the one that came with this blade.
I had an old bracket from the car-phone days that worked perfectly for mounting the plow controller to the door panel. I can comfortably lay my arm on the arm rest and operate the snow plow. I'm liking it. In this pic you can also see the back blade controller in the front center of the seats. It is mounted to the bottom of the bench seat and moves with the seat. Above that is the salter controller mounted to the lower dash panel.
When we told the manufacturer of the back blade that we wanted to mount a salter on the same truck as their blade, they basically just wished us luck. In very early custom designs they used a dual cylinder lift to raise the back blade. This made it possible to use whatever salter they were working with at the time. We didn't want to reinvent the wheel here and wanted each piece of this puzzle to work independently as they were intended. That is, if the blade comes off of this truck it can be mounted on another without any problems. Same for the salter. Everything has to be plug n play. This is what we came up with.
If the plow comes off it will not change anything with the salter. Right now the salt drops between the rear hitch of the truck and the power unit mount for the back blade. We replaced the short spinner shaft with the optional longer one and it now just clears below the mount and back blade. We're gonna make a new shaft about two inches longer to get things "just right". You can see the spread pattern is decent but we don't have the spinner mounted correctly. There are two holes in the bottom of the spinner shaft. The top hole is where the spinner bolts through the shaft. The bottom hole is for a cotter pin and catches the spinner if the top bolt shears. We have the spinner bolted in the bottom hole right now and need to lengthen the shaft to fix this. It's just one of those things you have to deal with when trying to make your own rules. The salter can only mount so low before resting on the plow mount and changing the length of that shaft was the easiest answer.
About the electric salt spreader. This unit is a dual electric motor setup. One motor spins the auger and one runs the spinner. Back in the day we ran gasoline powered spreaders and thought we had the world by the balls. Never mind that remote controls for gas engines always had issues or were froze if cable operated, or that you had to roll down the window and try to listen if the engine was cranking or that batteries went dead or the problem of running out of fuel. I don't miss any of that shit. Sure, my first reaction to the idea of an electric spreader was that they would be weak and not stand up to the abuse a commercial snow relocation technician would throw at them. I was wrong. These units are simple, reliable and plenty strong. The squeaking sound in the video is coming from the spreader but it's because I added a thick piece of rubber to the spinner shaft above a pillow block bearing. This was to protect the bearing from salt. I need to open the hole in that rubber as it's too dang tight right now.
I plan to take some video footage of the blade in action. I have the camera, mounts and such. I just need mother nature to provide some decent snow.
Sometimes a difficult job comes along that has special needs, and requires special equipment. A tree removal project on a steep hill has provided the need for a winch.
We want to pull logs up a hill at a fairly quick speed and we want to do this for the better part of a day. An electric winch would never handle our needs so the boss found a used hydraulic winch that he wanted mounted on the front of a skid loader. Our plan was to use a blank skid loader attachment plate and just make this thing a universal attachment that runs off of the implement hydraulics.
The start point of this build was an I beam that was just standing there in the corner begging to be used for a project. Because the winch fit in the beam and the beam didn't need to be cut to length, I decided to use it.
This is one of those projects that was based on a loose idea and the details were worked out as it progressed.
A few of the things to be worked out included the matter of hydraulic flow. The first issue is that this winch isn't rated for the kind of flow and pressure our equipment produces. Also, the in and out function is electrically controlled to switch oil flow and reverse the winch. That won't work with a skid loader that can also reverse the flow between its hydraulic lines. The simplest way out of this mess was to bastardize the cartridge valve in the winch manifold and let the machine functions control hydraulic flow. The electric handheld control that came with the winch is then eliminated.
Another issue was safety. If the winch cable were to break under load it could cause a lot of damage or maybe hurt someone. For this reason an expanded metal screen was built to protect the machine operator.
Another area of concern was winching against the parking brake. Different machines use different types of parking brakes. Some are locking pins and some are just applied brakes. Still other machines disconnect certain hydraulic, motion control or auxiliary functions when the p brake is applied. To aid in keeping the machine from moving, it was decided to make a small blade with spikes that could dig into the ground.
This is where the project stands today. We were gonna send it out for blasting and paint but decided instead to assemble it and do a few test runs, tweak whatever is needed and then send it out for paint. That's gonna happen here as soon as I get caught up. I was trying to get my new plow truck tooled up first but then a snow event set me back some. While all that was going on the incoming chainsaw repairs were backing up. I'll post more pics soon.
It started out innocent enough one day when I decided to mount the snow plow controller in my work truck in an unconventional location. I'm a "head hanger". I like to crank the heat, roll down the window and watch the snow roll off the end of my blade. Ya, it doesn't take much to amuse me. My truck has a hand held electronic controller rather than a permanent mount like we had back in the day. In fact way back I had a jeep that just had a hydraulic hand pump mounted between the front seats. pump, pump pump on the handle till the blade raised. Turn a relief knob to lower it. "Hydro turn" used to mean you got a wet foot when you got out of the truck to manually pull a pin and turn the blade.
The rest of the guys in the shop were giving me crap because I told them I leave the controller hanging on it's hook while I'm plowing. I hate fumbling with the controller and muscle memory allows me to always find the correct switch in an emergency situation. Trust me, when you plow for 8-12 hours or more in one sitting, you run into emergency situations whether real or self induced. So anyway, to get them to shut up I told them I've seen how slow they plow and if they ever advance to the next level they would know what I'm talking about. That started it and of course it didn't shut anyone up, but we now joke a lot about what level someone is plowing at. When I learned Greg had a break down during a sanding mission, I immediately sent him a text telling him losing a wheel drops you back a few levels from commercial snow fighter to mere plow jockey.
The boss has decided to upgrade my plow truck. The old dodge I'm running has a power plow that extends from 8.5 feet to 11 feet. It also has a v-body salter/sander. The replacement Ford F550 will get those same type units installed plus an additional blade hanging off the back of the truck. We wanted something that would reach under the front of parked semi trailers and our choice was the Ebling back blade. This blade is 8 feet wide with a pair of 4 foot wings for a total width of 16 feet. Ya, thats a whole lotta blade!
Of course when we decide to do something it never seems to come easy. Ebling doesn't make a quick attach mount for our model of truck so we had to order universal pockets that we welded to the truck.
This is the Ebling back blade in box configuration. We will pull loading docks with this.
A piece of C channel was bolted then welded to the side of the draw bar mount.
The other unpainted piece is the universal pocket that is the actual plow mount. It will be welded to the C channel.
Here is the blade mounted to the truck. It doesn't just drag behind, it also has down pressure.
Raised position
Fully extended to 16 feet.
Worn steer tires on the back and we were still able to pull a full box of wet snow. I think I'm gonna like this truck.
Back on the topic of controllers. This blade has its own, plus the one for the front plow and the one for the salter. We're also adding a rear facing camera. It's gonna be pretty busy in that cab and I'll show you how I dealt with it in a future post.
Also, stay tuned for a post about how in the heck I'm gonna mount a salt spreader on this truck and not have the spinner jammed up in that box full of snow. We have to figure this out because failure to mount that salter is not an option and right now I only have a few unproven ideas.
Progress continues on the BSA build. I say build. I dunno if that's accurate. It isn't a restoration but it has been stripped down to the bare frame. I really am not sure exactly what direction it will go but I don't want to push whatever it will become so I continue assembling the source of propulsion.
To install the output bearing of the transmission I put it in the freezer to chill for awhile and then warmed the housing where it will spend the rest of its useful days.
I like the above pic. Did I heat the aluminum to a red hot glow without any melting of the casting? Is that even possible? No, of course not. If the aluminum got that hot it would be a puddle on the work bench. The red glow is just a reflection from the heat gun. It didn't look like this on the phone screen when I took the pic. It's kinda neat when you scroll back in your picture gallery and find these "gems".
Trans bearing installed. This session was fueled by root beer. Spiked root beer. Satisfy my sweet tooth and catch a buzz. Win-win.
So here in the above pic we see the installed trans. The larger shaft is for the kick start and the smaller one is the shift shaft. The ratchet mechanism on that shaft that moves the shift plate is most likely the reason the bike only has three speeds. I cleaned it up but it really should be replaced. You'll also notice the idler gear between the crank and cam gears is missing. These gears are all marked so it was just a matter of lining everything up to achieve proper valve timing. No biggie.
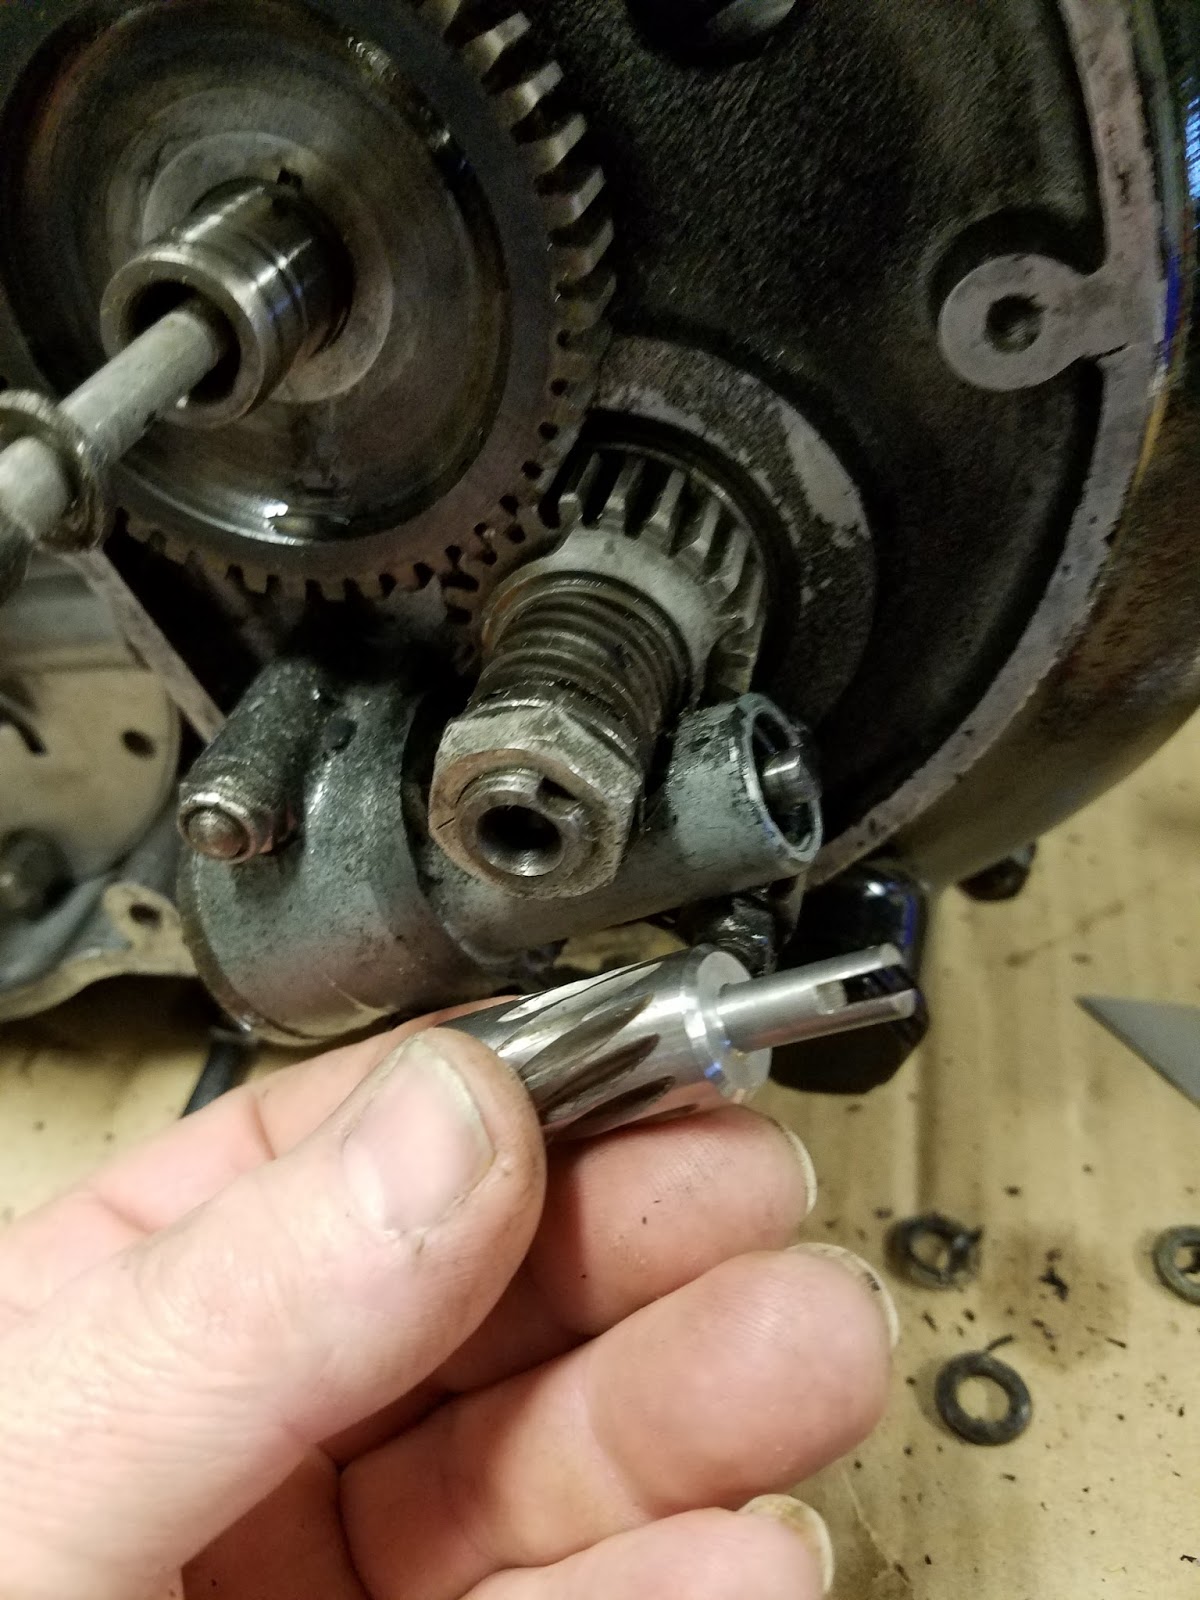
This is a new oil pump drive. On the right side of it is a slot for the tach cable. Look close and you can see the one that is still in the oil pump has the tangs broken off. I was delighted to find this new part among others that I don't even remember buying.
One thing I do remember is being fifteen years old and trying to wrap my head around things like valve timing, ignition timing and other basic engine principals. This time around it was no sweat and I was half in the bag.
There has been some talk (in my head) about converting to electronic ignition. One argument is that the bike may start easier which is a big bonus for a guy with a bad back and a kick only bike. The other argument is that this project is on a budget. If I'm gonna spend money it will only be on stuff I really need, like spiked root beer and black paint.