
The original plan was to make something out of sheet metal but when I got to thinking about it the amount of space savings would have been minimal over using 3/4 inch wood. I'm not a wood worker at all but this project really doesn't need to be kitchen cabinet quality. Its more like tree fort quality and I'm ok with that.

This turned out to be one of those "build it as you go" projects. I took some rough measurements of the hutch at work but built this drawer at home. Many of my thoughts were around the concern that I wasn't sure if it would fit.

The basic idea was that if a laptop lives in the hutch then it wastes 1/3 of the storage space. Nothing can be stored on top of it and nothing can hang from the side wall or back wall because it would interfere with the screen of the laptop. This meant a drawer was needed so I could slide the computer out and then lift the lid, while still being able to stack shit on top, or maybe put a mobile printer on top. Its sometimes nice to give customers a print out of diagnostics done on their equipment.

At this point I'm still shooting from the hip. Basically the project started when I saw a pair of drawer slides for sale at Menards.

The idea with the open side is to allow for power cords and usb cables to freely move with the drawer. I also wanted to be able to quickly remove the computer without dickin around with snaking cables through holes and whatnot.

The open side also allows extra room for thumb drives. Note the lack of routing, sanding or giving a shit. This is how it looked before I slapped a coat of paint on it.
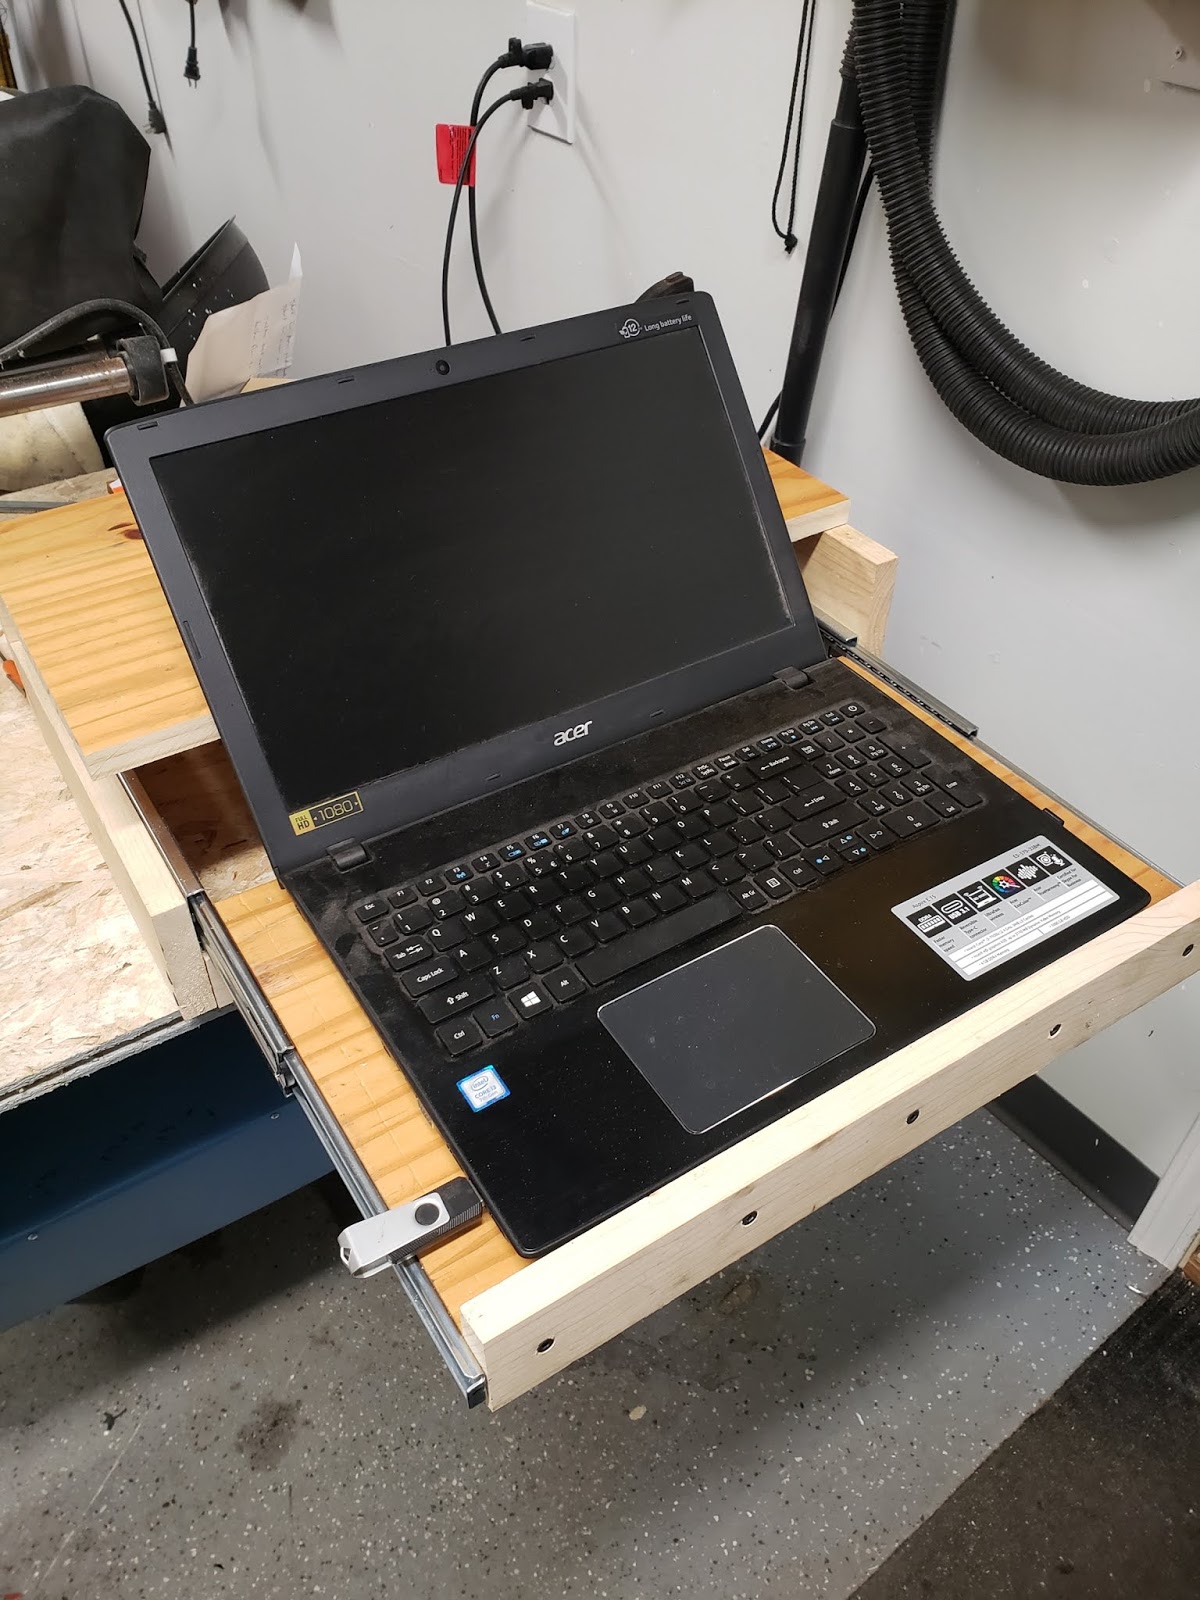
I held back the top shelf so the laptop lid could be tilted back quite a bit. I remember needing to do this to get the right viewing angle when I had a laptop in the hutch earlier.

The rubber mat should help with sliding and also helped raise the computer so thumb drives clear the side and rail better. At this point I think I'm done and can only wait two days to take it to work and give it a try. I'm aware that something has to be done to keep the whole drawer from tipping forward due to the weight when fully opened up. At first I was gonna put a big metal weight along the back, bottom edge. I then discovered that with the drawer open I could easily store paperwork under the drawer. There is a big opening due to the recessed top cover and about an inch and a half depth for schtuff.

Heres where it will live in the hutch.

And finally an action shot of the finished project!

I've been using it for a few days now and it really is ideal. All the goals were met and everything works as planned. Now all I need to do is some cleaning and I'll be ready for the spring rush.
Later.
Nicely done and finished. Maybe some flames…
ReplyDeleteI never would’ve gotten around to painting it.
Thanks. I have that spray booth and I had a can of high solids spray paint that was left over from my last employment, so at least eight years old. I didn't think it would even spray so I was surprised when it did. The stuff is called Seymour MRO industrial paint and always covered any mess in one coat.
ReplyDelete