I have a lot to do on the sporty to get it on the road but today we'll just talk about paint. I've talked about sanding the tank down and paint bubbling and other miserable reactions with the current paint and the old paint. I've gotten past that and am now moving forward with the base color, (duh, black). At the same time that I'm painting the sporty tank I've decided to paint the BSA tank, (duh, black).
Both tanks got their primer wet sanded. I used grey for the BSA and dark grey primer for the Sporty. Why? Because they say dark primer should go under dark paint and the topcoat is the same for both and I want to see if there really is a difference. I guess I'm a "show me" kind of guy. I'm not a pro painter and I'm just squirting these tanks with rustoleum so experimenting seems appropriate.
The first thing I had to do to the BSA tank was wet sand the primer and make it smooth.
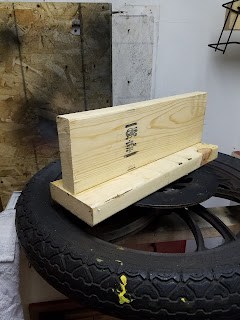
The next step turned out to be making a simple pedestal to set the tank on during painting.
This is the BSA tank with three coats of black sprayed within ten minutes of each other. The objective is to build a thick enough layer that can be wet sanded without sanding through.
The next step for the BSA tank will come in at least a few days when it gets wet sanded. At that point it will look something like the sporty tank does in the pic below. For those of you that don't paint, this is the basic finish of the black paint after sanding. Yes it looks dull but the clear coat will bring it back to life. Any imperfections you see are gonna be covered by the center cowl or the paint scheme I'm planning on adding later. Why mess with it when I can hide it!
After three layers of clear this is what the tank looks like now.
It doesn't look terrible but I think it will get wet sanded and clear coated again. At this point if I'm ever gonna up my game in the painting department then I need to do some experimenting. Worst case scenario is I screw the whole thing up and it looks like ass. You've seen some of the crap I'll ride and you know that really doesn't matter to me that much. Knees in the breeze and all that.
By the way, this little 4 foot by 9 foot spray booth is one of the smartest things I've ever done. It sure is nice to have a clean dust free and stink free indoor place for these projects.
Later.


I recently discovered how much fun doing your own painting can be, especially if show quality is not the objective. A paint room would be nice though.
ReplyDeleteI'm worried that I'll get the solid color the way I want it then screw up painting the graphics and have to start over. oh well.
ReplyDelete