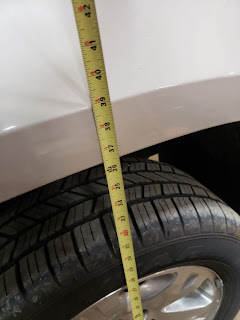
I remembered to take measurements before anything got torn apart. The front measured 36.5" to the fender. The rear was 38".
One thing that had to happen was removing the strut/coil and adding a spacer block on top of it. Simple stuff.
Another thing that had to be done was to remove the upper control arm with its ball joint. The new ball joint has more range of motion to allow for the lift. The control arm on the drivers side was like new but the passenger side was rusted in tight and required some cutting. At first I tried using an air powered sawzall but finally got the torch out and sped up the process.
Besides dealing with the lift components at the wheels, I also had to drop the front differential. This helps keep the cv shaft angle respectable. The bolts were kinda a pain to get out and equally as painful was having to grind some of the differential itself to let it clear the cross member section welded to the frame.
Then, the cross member itself had to be relieved to clear the diff. It all fits quite snug now that the grinding is done.
There were a lot of little problems and what I just told you took all day. Except for helping at the store, I worked on that front end from 7am - 5pm. I then started the rear which consisted of a spacer on top of the coils, shock extensions, brake line bracket extension and longer sway bar connectors. I think that about covers it and that only took two hours. It would have been an hour and a half if I would have remembered to bring my coil spring clamps.
The finished result for front fender height is 40". Thats a 3.5 lift as advertised. To me it doesn't look that high. The rear started at 38" and ended at 41.5". Thats three and a half as well but I swear the kit was advertised that the truck would be level when done. I thought the back was only supposed to go up 1.75". Oh well, maybe the front coils are weak.
Parked here on my sloped drive it does look level. At 3.5 inches the lift is subtle but I can really see the difference when its parked next to other vehicles. Then it becomes obvious its not stock, and thats part of what I wanted. Its not so high I need a ladder but just high enough to justify using the running board. Not a jacked up mall-crawler or an off road wannabe but pretty good I think for a station wagon that will spend most of its time on the street.
Later.


Looks pretty good! I always hate working on suspensions. Everything is always frozen...
ReplyDeleteThe good news is that while it was on the hoist I had a chance to scrutinize and its not in terrible shape under there.
ReplyDelete