I went for a ride the other day. I didn't take the Ultra or the Sportster. I didn't even take the Rat Turd. The bike I rode was an '86 Honda Rebel 250. This is Brookes bike that I got ready for her to ride this summer. After putzing around with it for a while, all that was left was a test ride and the 23 miles between our house and hers would qualify.
Now I'm not complaining but the Rebel is a small bike. Trying to get my toe under the shifter was difficult and my knees were pretty close to the bars. Nevertheless, I was able to operate the bike ok.
It ran pretty decent and I was surprised to discover it would haul my fat ass at 75 mph if I tucked in. I also discovered the light little bike doesn't tolerate a lot of body movement. Frame flex becomes an issue when carving corners.
None of that matters because Brooke is a lot lighter than I am and the bike fits her well. She was happy to get it back and I heard she took it for a problem free 50 mile ride yesterday.
I enjoyed working on the Rebel and I'll happily help Brooke out with any issues that may arise but I'm equally excited to get the bike off my lift table. I am eager to get started putting the BSA together and it's warm enough outside to paint some parts so I really should get started with that, but not today. I'm heading in to work to try and catch up with lawn treatments while the weather is decent. I won't work all day, just long enough to feel I've made an effort to get a few accounts off the list. Later this afternoon my wife and I will go for a dinner cruise on the Ultra. The weather is gonna be perfect.
Later.
Showing posts with label Honda. Show all posts
Sunday, May 22, 2016
Sunday, May 15, 2016
More Rebel Updates
It's been a while since I reported on the Rebel revival so here is your long awaited update. I talked about fixing the rear brakes and now was time to rebuild the front.
The master cylinder was full of goo and the caliper pistons were too.
They were hanging up and not returning in their bore. I ordered a
rebuild kit for the master and seals for the caliper pistons.
With the lighting cleaned up, the next step was to fire the bike up. The bike cranked without even a pop for about a minute before I realized the kill switch was engaged. After correcting that issue she fired right up. Unfortunately it leaks fuel and I had to order some gaskets. Those gaskets arrived in the mail yesterday and I'll put the carb back on the bike today.
That's about it. If the test ride goes ok, the next post you'll read about this bike will include some pics of me delivering it back to Brooke.
Everything cleaned up and went together fine and the air easily bled out of the system.
The next project was to trace down an electrical gremlin. The left rear turn signal wasn't working and the problem seemed intermittent. After about an hour of pissing around I determined the problem was in the bulb socket. The ground lug is crimped into the socket housing and in this case the crimp was loose. A spot of solder fixed that right up and the light now goes blinkity blink as it should.
That's about it. If the test ride goes ok, the next post you'll read about this bike will include some pics of me delivering it back to Brooke.
Sunday, April 10, 2016
Rebel Maintenance Continued
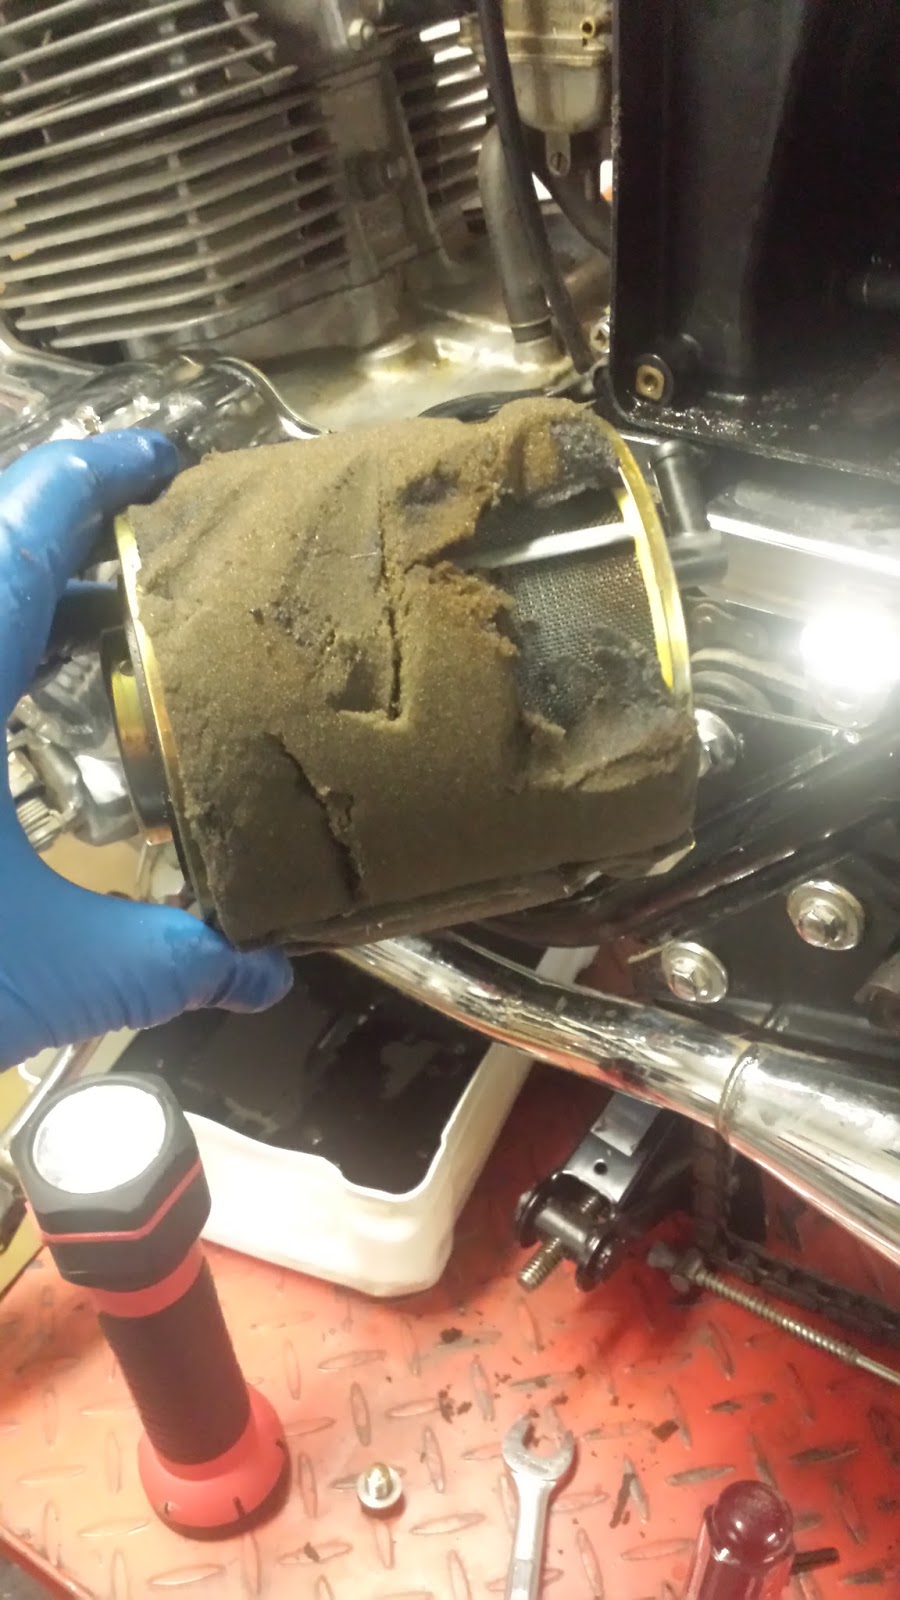
I've been picking away at my to-do list on Brookes Honda Rebel. When I was digging through a box of spare parts I noticed an air filter without the foam wrap. I didn't give it a second thought until I inspected the filter in the black bike that I'm prepping for her.
While I was filling my virtual cart I decided to pick up some turn signal mounts. It's just an adapter between the fender and the light stem that flexes if bumped into. A droopy light just looks like the bike gave up, or worse, spent time on its side. Here is a pic with the new mounts.
Yesterday I ordered a master cylinder rebuild kit and caliper seals for the front brake. Once that is fixed all I have left is a turn signal that won't flash and some fuel hose. Then I can push it out the door and see if it runs!
Later.
The foam was just falling off of it as it was removed from the bike. I'm sure that's what happened to the other filter. The body and mesh screen are fine but the foam will get replaced. The big aftermarket sources don't list it so for shits and goggles I did a search online an up popped amazon. I've been using them a lot lately for odd parts and their service is great. Most of you already know that. On the topic of Amazon, I ordered and received tires for this bike. The seller was listed as Amazon, not some second party and when they arrived they looked like this.
They are packaged with cardboard supports in between the beads to help support the shape of the tire. I've ordered a lot of bike tires and have never had them show up this way. They are usually just banded tight and deformed. I'm not sure if its a Kenda thing or Amazon but I like it.
Yesterday I ordered a master cylinder rebuild kit and caliper seals for the front brake. Once that is fixed all I have left is a turn signal that won't flash and some fuel hose. Then I can push it out the door and see if it runs!
Later.
Sunday, March 13, 2016
Two Wheeler Tank Sealer
I'm a little late getting todays post out. I was gonna write it last night but my wife and I went out to dinner and I was introduced for the first time to martinis. Of course in my uncouth ways, I was chasing that with beer. I'm sure that didn't go unnoticed. Anyway, when I got home I was in no mood to write a blog.
Yesterday was one of those rare warm march days that are becoming less rare around here. I started out by fixing the rattling front brake caliper on the sporty. I bought the part last spring and just got around to the repair. Ya. The second pic shows the bent "anti rattle clip" or whatever HD calls it. Not sure how it got bent but the noise is gone.
After that I strapped a new rear tire to my sissy bar and rode to the shop to do one last burnout and swap it out. The tire change went fine but trying to seat the bead was a pain. The tire would fill up but one spot of the tire wouldn't push tight to the edge of the rim evenly. I had to deflate and clean/inspect that section of tire a few times and it finally took once I got aggressive on how much pressure I was willing to use to get it to seat.
A new tire means a test ride and I took advantage of the nice weather. I broke in that tire with a 200 mile tour of area back roads. Some of the lesser roads still have sand on them so I wasn't testing lean angles. I did not balance that tire, just lined the yellow dot on the Dunlop with the valve stem and everything feels fine (for a sportster).
When I got home I decided another warm weather activity that needed doing was coating the fuel tank on Brookes Rebel. Traditionally I do this with Kreem. The process involves degreasing the tank, using acid to remove the rust, another rinse, a chemical that removes water and then quickly adding the actual coating product. I've had good luck but have heard a lot of people complain that Kreem doesn't work and I suspect that they had issues with one of the steps. Like many tasks, prep work is the most important step.
This time I wouldn't be using Kreem. Brooke bought a product called Caswell Tank Sealer and this would be my first experience with it. This is a two part epoxy. The main difference on a metal tank is that you don't etch the tank to bare metal. Get the loose rust out and call it good. According to the instructions the most important thing is accurately and completely mixing the two parts if your not using all of it. I had a kit for sealing something much bigger than a two gallon Rebel tank but mixed all of it when I discovered how thick the mixture was. Even after adding a splash of xylene to thin the mix it still moved like cold syrup. The Rebel tank doesn't let me see much at all inside the tank so I had to imagine where the mix was flowing. This is much easier when the mix is thin and flowing evenly.
After feeling confident everything was coated, I removed the plug on the tank petcock and propped the tank to drain the excess. We went to dinner and when we came back hours later I noticed a lot of epoxy had drained and it was kinda gummy. I was nervous I hadn't done something right and it wasn't going to set up. The martinis insured I would sleep well despite my concerns. This morning when I inspected the tank I was pleased to see a rock hard 1/2" thick layer of epoxy in my catch bucket. I'll bring home an inspection camera tomorrow and see if I lined the entire tank.
My impressions of the Caswell product are good. It is easier to use than some other products and doesn't smell as bad (if at all). There are no chemicals left over to deal with either. A quick look at their site tells me pricing is comparable too. I think I'd be willing to try it again.
Yesterday was one of those rare warm march days that are becoming less rare around here. I started out by fixing the rattling front brake caliper on the sporty. I bought the part last spring and just got around to the repair. Ya. The second pic shows the bent "anti rattle clip" or whatever HD calls it. Not sure how it got bent but the noise is gone.
After that I strapped a new rear tire to my sissy bar and rode to the shop to do one last burnout and swap it out. The tire change went fine but trying to seat the bead was a pain. The tire would fill up but one spot of the tire wouldn't push tight to the edge of the rim evenly. I had to deflate and clean/inspect that section of tire a few times and it finally took once I got aggressive on how much pressure I was willing to use to get it to seat.
A new tire means a test ride and I took advantage of the nice weather. I broke in that tire with a 200 mile tour of area back roads. Some of the lesser roads still have sand on them so I wasn't testing lean angles. I did not balance that tire, just lined the yellow dot on the Dunlop with the valve stem and everything feels fine (for a sportster).
When I got home I decided another warm weather activity that needed doing was coating the fuel tank on Brookes Rebel. Traditionally I do this with Kreem. The process involves degreasing the tank, using acid to remove the rust, another rinse, a chemical that removes water and then quickly adding the actual coating product. I've had good luck but have heard a lot of people complain that Kreem doesn't work and I suspect that they had issues with one of the steps. Like many tasks, prep work is the most important step.
This time I wouldn't be using Kreem. Brooke bought a product called Caswell Tank Sealer and this would be my first experience with it. This is a two part epoxy. The main difference on a metal tank is that you don't etch the tank to bare metal. Get the loose rust out and call it good. According to the instructions the most important thing is accurately and completely mixing the two parts if your not using all of it. I had a kit for sealing something much bigger than a two gallon Rebel tank but mixed all of it when I discovered how thick the mixture was. Even after adding a splash of xylene to thin the mix it still moved like cold syrup. The Rebel tank doesn't let me see much at all inside the tank so I had to imagine where the mix was flowing. This is much easier when the mix is thin and flowing evenly.
After feeling confident everything was coated, I removed the plug on the tank petcock and propped the tank to drain the excess. We went to dinner and when we came back hours later I noticed a lot of epoxy had drained and it was kinda gummy. I was nervous I hadn't done something right and it wasn't going to set up. The martinis insured I would sleep well despite my concerns. This morning when I inspected the tank I was pleased to see a rock hard 1/2" thick layer of epoxy in my catch bucket. I'll bring home an inspection camera tomorrow and see if I lined the entire tank.
My impressions of the Caswell product are good. It is easier to use than some other products and doesn't smell as bad (if at all). There are no chemicals left over to deal with either. A quick look at their site tells me pricing is comparable too. I think I'd be willing to try it again.
Sunday, March 6, 2016
Lost and Found
It seems lately that losing parts has become a regular pastime of mine. You know, kinda like a hobby. Some people collect baseball cards or belly button lint. I misplace shit am I'm good at it. Oh sure I usually find the lost crap but its never in a timely manner. Because of this I decided to be very careful when I removed the steering neck from Brookes Rebel. I know the ball bearings are loose in there and they are small. I also doubt anyone has had this apart in thirty years so I'm not sure if they will stick in place or fall out easily.
Despite my best attempts to not drop these bearings, I dropped a bunch of them from both the top and bottom. I was doing my best rain man impersonation trying to count them as I heard them bouncing off parts of the bike and landing on the lift table.
Don't beat yourself up if you don't see it. I didn't see it the first two times I looked under there but because I have a lot of practice at this lost and found hobby of mine it eventually turned up.
So thats it. The steering neck bearings have been serviced and the next step is dealing with the fork tubes.
In other news...I woke up this morning checking the forecast and realized its about that time of year when my truck can sit outside. That means I can have that bay open for bikes. This is a good thing because I've got a lot of work to do on the ones that were in hibernation.
Later.
Despite my best attempts to not drop these bearings, I dropped a bunch of them from both the top and bottom. I was doing my best rain man impersonation trying to count them as I heard them bouncing off parts of the bike and landing on the lift table.
Been there, done that. Blogged about it. Next step was to take a head count and see how many actually went AWOL.
I was missing five but they hadn't gone far. At least four of them were easy to locate. That leaves one. This is typical. If you can't find one then you might as well not have any and just buy new bearings.
It was now time to go into search mode, a drill I'm all too familiar with. Break out the cheater glasses and a bright flashlight, start on one end and try not to disturb too much stuff. This particular search included a halftime break where I ran to the gas station for more refreshments. When I got back, after a lot more searching I finally found that one sneaky bearing hiding under the jack.
So thats it. The steering neck bearings have been serviced and the next step is dealing with the fork tubes.
In other news...I woke up this morning checking the forecast and realized its about that time of year when my truck can sit outside. That means I can have that bay open for bikes. This is a good thing because I've got a lot of work to do on the ones that were in hibernation.
Later.
Wednesday, February 24, 2016
Rebel Fuel
I've known from the start that if the Rebel was gonna run again I would have to go into the carb. Its not that big of a deal but on a thirty year old bike you never know what parts may no longer be available. You also don't know what others before have left you to deal with. For example, buggered screw heads. Hey, if you stripped it taking it out, why put that shit screw back in the bike?
Right away I could see the choke cable adapter to the carb was broken. Its broken on the spare bike too. These used to be made from brass but now they are plastic.
I did get lucky because I was able to unscrew the broken piece out of the carb without cutting the cable. I was also lucky to find Honda still offers that piece. The unlucky part is that it cost $34.
One part that doesn't seem to be available is the fuel pump diaphragm. The pump shaft was bent and I'm not really sure how that could have happened in normal use. I suspect it was bumped or messed with by a previous mechanic. Brooke did complain about the throttle sticking but I don't think a bent shaft on the pump would cause the throttle to hang on this CV carb. I'll take a closer look when I put it back together. Also the rubber diaphragm was quite stiff. So what do you do to soften up the pump?
To be honest I don't know but this is what I'm trying. I think this transmission tune up magic juice may help. I've heard that these stop leak products soften rubber seals. I figured it was worth a try so
I soaked it for a week or so and it is much better. The carb is back together and on the bike but I gotta seal the tank before I can put gas in and fire it up.
End.
Right away I could see the choke cable adapter to the carb was broken. Its broken on the spare bike too. These used to be made from brass but now they are plastic.
I did get lucky because I was able to unscrew the broken piece out of the carb without cutting the cable. I was also lucky to find Honda still offers that piece. The unlucky part is that it cost $34.
One part that doesn't seem to be available is the fuel pump diaphragm. The pump shaft was bent and I'm not really sure how that could have happened in normal use. I suspect it was bumped or messed with by a previous mechanic. Brooke did complain about the throttle sticking but I don't think a bent shaft on the pump would cause the throttle to hang on this CV carb. I'll take a closer look when I put it back together. Also the rubber diaphragm was quite stiff. So what do you do to soften up the pump?
To be honest I don't know but this is what I'm trying. I think this transmission tune up magic juice may help. I've heard that these stop leak products soften rubber seals. I figured it was worth a try so
I soaked it for a week or so and it is much better. The carb is back together and on the bike but I gotta seal the tank before I can put gas in and fire it up.
End.
Wednesday, February 17, 2016
Black Cats and Gremlins
Its always something. Something as simple as greasing a swing arm bushing shouldn't turn into a project.
I was thrilled when I saw grease zerks on the swing arm of the little Rebel. This would mean if they took grease I could move on to something else. I think there are gremlins living in my shop or maybe it was when this guy crossed my path...
The repair went smooth and it did give me a chance to better inspect the bushings and shaft which were fine.
Yesterday I had a thought. It was one of those really witty realizations and it was my own original idea. I couldn't write it down because I was driving but it was so good I figured I couldn't possibly forget it. Well I forgot it so I want you to pretend that you just read something very creative and inspirational. You're welcome.
I was thrilled when I saw grease zerks on the swing arm of the little Rebel. This would mean if they took grease I could move on to something else. I think there are gremlins living in my shop or maybe it was when this guy crossed my path...
...because when I pulled the side cover off the engine to access the zerk, it broke off in my grease gun. Luckily for me I had everything needed for this repair to include a 90 degree zerk, an easy-out for removing the broken piece and plenty of beer.
Yesterday I had a thought. It was one of those really witty realizations and it was my own original idea. I couldn't write it down because I was driving but it was so good I figured I couldn't possibly forget it. Well I forgot it so I want you to pretend that you just read something very creative and inspirational. You're welcome.
Sunday, February 14, 2016
what up
I know its getting closer to riding season because my commute home from work is no longer in the dark. Oh sure its still colder than polar bear paws but at least the wait time to the first ride of the season seems just around the corner.
Or is it? I'm enjoying working on bikes this winter but lately I've been jonesing for a ride on the Ultra. Unfortunately that won't be the first bike out of hibernation. Salt residue on the roads will mean the rat or sportster will be the first bikes to drink the sweet petrol this spring. Either way, spring needs to get here quickly or I may slip away into withdrawals. Even my wife has been talking about where we can ride to this spring. Bike fever has spread through this house and we all know there is only one cure.
So what else? Well I hadn't mentioned it here yet but a few months back my employer sold the business that he built from scratch. This came as a shock to everyone at work as he and the new owner didn't leak their intentions to anyone. Our first reactions were typical. Why? Are you ok? How will this effect me? As it turns out everyone stayed on and although he has some big shoes to fill, it looks like the new owner will do alright. You would think after something like this transpired that there would be rumor or concern. I'm not hearing any of that and I'm excited to retain my job and move forward.
Speaking of retaining my job, there is no shortage of broken shit to fix. We've had a streak of breakdowns lately. Some are just regular maintenance things and others are real life dumb shit attacks. So when someone starts with the small talk and asks if we're keeping busy, I laugh and say ya, we're always busy, how can I help you? Translated that means get to the point so I can keep pushing on.
Back at home in my little workshop I'm sitting at my desk wondering how it got so messed up again. Didn't I just report to you about cleaning it? The pile appears to be about eight inches deep but this time there doesn't seem to be a lot of trash. I must have a hat fetish cuz I can see five without even digging. More GoPro shit, some parts catalogs, the front axle for my BSA along with some engine side cover bolts I bought. I guess there is also some stuff that doesn't belong in here like three sleeves of ritz crackers I forgot to take to work for lunches. Its a small room to be working on two bikes at once so flat surfaces are valuable real estate.
When I turn around its not much better.
Brookes tires, tubes and rim strips came in. I gotta get the rear swapped out so I can put the back of the bike together, spin it around on the lift, and pull the forks to check the neck bearings. I see a couple of chainsaws I need to work on. The box under the lift has BSA goodies in it and if you "wheres waldo?" the picture you might see the BSA cylinders I recently got back from honing.
Brookes little Honda is thirty years old and has been in storage for a while so there is rust on some chrome and the paint is rough. She wants to keep the bike original if possible and because this bike is a special edition model it has a bunch of fancy stickers on it. The plan is to attempt to buff out the tank and make it presentable. I first washed it then used Maguiars Ultra Cut compound with an orbital buffer. I followed up with some wax. It looks like it might be alright but there are some scratches yet and a few chips. I think I'll go back and buff it one more time and re-wax it. It is what it is and the only other option is to source some decals and have a professional paint it. I still need to deal with the inside of the tank. I can hear the rust rolling around in there. More on that when it happens.
Although my wife and I don't celebrate Hallmark holidays, I figure it wouldn't hurt to say Happy Valentines Day Honey!
Later.
Or is it? I'm enjoying working on bikes this winter but lately I've been jonesing for a ride on the Ultra. Unfortunately that won't be the first bike out of hibernation. Salt residue on the roads will mean the rat or sportster will be the first bikes to drink the sweet petrol this spring. Either way, spring needs to get here quickly or I may slip away into withdrawals. Even my wife has been talking about where we can ride to this spring. Bike fever has spread through this house and we all know there is only one cure.
So what else? Well I hadn't mentioned it here yet but a few months back my employer sold the business that he built from scratch. This came as a shock to everyone at work as he and the new owner didn't leak their intentions to anyone. Our first reactions were typical. Why? Are you ok? How will this effect me? As it turns out everyone stayed on and although he has some big shoes to fill, it looks like the new owner will do alright. You would think after something like this transpired that there would be rumor or concern. I'm not hearing any of that and I'm excited to retain my job and move forward.
Speaking of retaining my job, there is no shortage of broken shit to fix. We've had a streak of breakdowns lately. Some are just regular maintenance things and others are real life dumb shit attacks. So when someone starts with the small talk and asks if we're keeping busy, I laugh and say ya, we're always busy, how can I help you? Translated that means get to the point so I can keep pushing on.
Back at home in my little workshop I'm sitting at my desk wondering how it got so messed up again. Didn't I just report to you about cleaning it? The pile appears to be about eight inches deep but this time there doesn't seem to be a lot of trash. I must have a hat fetish cuz I can see five without even digging. More GoPro shit, some parts catalogs, the front axle for my BSA along with some engine side cover bolts I bought. I guess there is also some stuff that doesn't belong in here like three sleeves of ritz crackers I forgot to take to work for lunches. Its a small room to be working on two bikes at once so flat surfaces are valuable real estate.
When I turn around its not much better.
Brookes tires, tubes and rim strips came in. I gotta get the rear swapped out so I can put the back of the bike together, spin it around on the lift, and pull the forks to check the neck bearings. I see a couple of chainsaws I need to work on. The box under the lift has BSA goodies in it and if you "wheres waldo?" the picture you might see the BSA cylinders I recently got back from honing.
Brookes little Honda is thirty years old and has been in storage for a while so there is rust on some chrome and the paint is rough. She wants to keep the bike original if possible and because this bike is a special edition model it has a bunch of fancy stickers on it. The plan is to attempt to buff out the tank and make it presentable. I first washed it then used Maguiars Ultra Cut compound with an orbital buffer. I followed up with some wax. It looks like it might be alright but there are some scratches yet and a few chips. I think I'll go back and buff it one more time and re-wax it. It is what it is and the only other option is to source some decals and have a professional paint it. I still need to deal with the inside of the tank. I can hear the rust rolling around in there. More on that when it happens.
Although my wife and I don't celebrate Hallmark holidays, I figure it wouldn't hurt to say Happy Valentines Day Honey!
Later.
Wednesday, February 10, 2016
Rebel Brakes
Todays blog is about Brookes broken back brakes. I brought the bike with the busted binders onto my bench. Before I could break loose the buggered bolts I had to blast them with busterloose. Bringing the brakes back to brand new condition was but a matter of breaking the bits down to their base configuration and brushing some grease on the bushings. Because the backing plate was breaking out with little blisters of rust, buffing was not my best option. Bringing it back to its original luster was best done by hand.
Enough of that bull. I just had a bug in my butt to be a bastard.
The brake shoe cam was in need of some lube because the original grease had turned to a sticky gunk. I suspect the steering neck bearings will look the same although I may luck out with the swing arm bearings. This bike has grease zerks for those and just maybe someone greased them in the last thirty years. Either way, I plan to go through the whole bike and make sure every part works as it should. We dasn't neglect the brakes as that would go against the #1 rule of riding...never outrun your guardian angel or as I interpret it, don't ride faster than your brakes.
While I had the rear hub apart I figured it would be easiest to polish that chrome now. There is some pitting so I had to be careful not to scratch the good chrome. It turned out alright.
Lookin good. The chrome looks decent too.
And finally, a short video for Brooke so she can see what I was telling her about the sticky brake pedal.
Enough of that bull. I just had a bug in my butt to be a bastard.
The brake shoe cam was in need of some lube because the original grease had turned to a sticky gunk. I suspect the steering neck bearings will look the same although I may luck out with the swing arm bearings. This bike has grease zerks for those and just maybe someone greased them in the last thirty years. Either way, I plan to go through the whole bike and make sure every part works as it should. We dasn't neglect the brakes as that would go against the #1 rule of riding...never outrun your guardian angel or as I interpret it, don't ride faster than your brakes.
While I had the rear hub apart I figured it would be easiest to polish that chrome now. There is some pitting so I had to be careful not to scratch the good chrome. It turned out alright.
And finally, a short video for Brooke so she can see what I was telling her about the sticky brake pedal.
Sunday, January 31, 2016
Just An Oil Change
Rule #1 when working on older bikes-It's never "just" anything. This oil change is a perfect example of that. Sure, it started simple enough. I put a suitable catch pan under the engine and removed the drain plug. Didn't spill a drop. There is no oil filter to change, rather it has a pickup screen on the oil pump that Honda recommends cleaning every 8000 miles. A quick glance at the odometer tells me we are just a test ride away from that magic number so now seemed like the perfect time to investigate.
The oil pump lives behind this side cover.
No problem. I'll just remove the ten or so bolts that secure the cover and pop it off.
Are you kidding me? No amount of pry bar and hammer tapping would budge this thing. I had to use the hydraulic porta-power to pop it loose. Once I had it off I could access the pickup screen below the oil pump. If you look close at the top middle cover bolt hole, you'll notice part of the bolt is still in there. Ya, it twisted off when I unbolted the cover and I blame Honda for this one. That is the only cover bolt that is drilled all the way through and it couldn't have been in a worse place. It's almost like they wanted it to seize. Any moisture or dirt on top of the engine case is funneled down to the back of this bolt hole. Piss poor design. Shame on you Honda.
You guys that work on these things know the drill. First, center punch the remaining bolt.
Then start with a small pilot bit and work your way up to the hole size you need for the rethreading tap.
Once the hole is made you can start with the tap. Use oil on the tap and be careful not to break it off in the hole. If you feel like ya gotta horse it then back it out, clean it off and oil the tap again. I had to back this tap out four times while making only about a half inch of threads.
Success! I have fresh threads and just need a new bolt. That won't be a problem because I have an entire parts bike out in the trailer. If there are any younger readers out there interested in bike or small engine repair I suggest you invest in a tap and die set. They are the kind of tools you hope you never need to use but they are priceless when you need them.
Later.
The oil pump lives behind this side cover.
No problem. I'll just remove the ten or so bolts that secure the cover and pop it off.
Are you kidding me? No amount of pry bar and hammer tapping would budge this thing. I had to use the hydraulic porta-power to pop it loose. Once I had it off I could access the pickup screen below the oil pump. If you look close at the top middle cover bolt hole, you'll notice part of the bolt is still in there. Ya, it twisted off when I unbolted the cover and I blame Honda for this one. That is the only cover bolt that is drilled all the way through and it couldn't have been in a worse place. It's almost like they wanted it to seize. Any moisture or dirt on top of the engine case is funneled down to the back of this bolt hole. Piss poor design. Shame on you Honda.
You guys that work on these things know the drill. First, center punch the remaining bolt.
Then start with a small pilot bit and work your way up to the hole size you need for the rethreading tap.
Once the hole is made you can start with the tap. Use oil on the tap and be careful not to break it off in the hole. If you feel like ya gotta horse it then back it out, clean it off and oil the tap again. I had to back this tap out four times while making only about a half inch of threads.
Success! I have fresh threads and just need a new bolt. That won't be a problem because I have an entire parts bike out in the trailer. If there are any younger readers out there interested in bike or small engine repair I suggest you invest in a tap and die set. They are the kind of tools you hope you never need to use but they are priceless when you need them.
Later.
Wednesday, January 20, 2016
Rebel Yell
There is no shortage of projects here in my little workshop. The latest is my sister-in-laws Honda Rebel. She has two of them and they are the 250cc version, one being the limited edition model. She crashed one when the rear brake locked up on her and they have been sitting in storage for a while. I picked up both bikes, hauled them home, and need to get one going for her by spring.
I like to start these types of projects with a bath. After I'm squeaky clean I begin washing the bike.(rimshot) The point of washing the bike from front fender to tail lamp isn't so much to make it pretty although working on a clean bike is much more appealing than working on a dirty one. Cleaning it allows me to touch and look at every square centimeter of this Japanese vision of an American cruiser. If it's still dirty in one spot then I haven't looked there yet. When I notice an oil stain or a spot with abnormal wear then I make an entry in a notebook. These notes along with the owners original statements really help me cover all possible problems with the bike. Of course a test ride is a big part of that too but that's way down the road from where I am now.
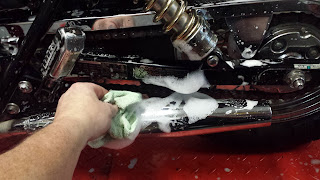
At first glance it seems to be shining up quite well. Unfortunately there is some pitted chrome on this scoot and Brooke will have to decide how in depth this project will become. For now the plan is to make it safe and reliable. If you're interested, the following is a parts list and a "to do" list of possible issues. If you're not interested in such things, now is a good time to tune out because no entertaining content follows. No one-liners, no attempts at humor, NOTHING.
FUEL SYSTEM-Fix rusty fuel tank-gonna try a product I never used before-Caswell epoxy fuel tank sealer, replace hardened fuel lines and filter, clean carb, check sticky throttle control, why is there a fuel stain on engine below carb?
BRAKES/SUSPENSION-adjust rear brake, rear brake pedal is slow to return-lube brake lever pedal and shoe cam shaft, inspect shoes/pads, replace front brake fluid, replace fork oil, check wheel bearings.
ENGINE-compression test, change oil, adjust valves, check cam chain adjuster, change spark plugs, check air filter, adjust clutch, fix any leaks.
THE REST-grease steering neck bearings, replace battery, the tires look "like new" and still have dimples but are eight years old, fix drooping turn signals, seat has some tears, check swingarm bearings, check chain and sprocket for wear, make sure everything electrical is working, test ride.
I like to start these types of projects with a bath. After I'm squeaky clean I begin washing the bike.(rimshot) The point of washing the bike from front fender to tail lamp isn't so much to make it pretty although working on a clean bike is much more appealing than working on a dirty one. Cleaning it allows me to touch and look at every square centimeter of this Japanese vision of an American cruiser. If it's still dirty in one spot then I haven't looked there yet. When I notice an oil stain or a spot with abnormal wear then I make an entry in a notebook. These notes along with the owners original statements really help me cover all possible problems with the bike. Of course a test ride is a big part of that too but that's way down the road from where I am now.
At first glance it seems to be shining up quite well. Unfortunately there is some pitted chrome on this scoot and Brooke will have to decide how in depth this project will become. For now the plan is to make it safe and reliable. If you're interested, the following is a parts list and a "to do" list of possible issues. If you're not interested in such things, now is a good time to tune out because no entertaining content follows. No one-liners, no attempts at humor, NOTHING.
FUEL SYSTEM-Fix rusty fuel tank-gonna try a product I never used before-Caswell epoxy fuel tank sealer, replace hardened fuel lines and filter, clean carb, check sticky throttle control, why is there a fuel stain on engine below carb?
BRAKES/SUSPENSION-adjust rear brake, rear brake pedal is slow to return-lube brake lever pedal and shoe cam shaft, inspect shoes/pads, replace front brake fluid, replace fork oil, check wheel bearings.
ENGINE-compression test, change oil, adjust valves, check cam chain adjuster, change spark plugs, check air filter, adjust clutch, fix any leaks.
THE REST-grease steering neck bearings, replace battery, the tires look "like new" and still have dimples but are eight years old, fix drooping turn signals, seat has some tears, check swingarm bearings, check chain and sprocket for wear, make sure everything electrical is working, test ride.
Sunday, November 30, 2014
Random Pic Day
I was thumbing through my phone today and saw a theme for a few bike pics. Not sure why I take pics at this angle. I guess I just like to get a feel of the size of the beast.
All the kids were home for the holiday. It's kinda a tradition to sit around the dining room table and play board games including monopoly. Last nights game will go down as one of the most memorable. Lots of deal making, mini tantrums and rule checking went on. Because of a deal I made with Kenzo where she had free rent for life, I decided to tear down hotels and sell a monopoly for $1 to another player, then fund rebuilding of the hotels. The plan worked and the game ended with a huge shellacking as I rose to victory. Ya, we've got our own rules.
![]() |
| Big beautiful bike |
![]() |
| This is Dans Warrior in two-up touring mode. |
![]() |
| My '67 BSA |
![]() | |
| I've seen this bike at a few shows. Doesn't matter what brand it is, it's just cool. |
All the kids were home for the holiday. It's kinda a tradition to sit around the dining room table and play board games including monopoly. Last nights game will go down as one of the most memorable. Lots of deal making, mini tantrums and rule checking went on. Because of a deal I made with Kenzo where she had free rent for life, I decided to tear down hotels and sell a monopoly for $1 to another player, then fund rebuilding of the hotels. The plan worked and the game ended with a huge shellacking as I rose to victory. Ya, we've got our own rules.
Subscribe to:
Posts (Atom)